
Debugging Tips for iOS Developers: Common Issues and Fixes Debugging is an essential skill for any iOS developer. As applications grow in complexity, identifying and resolving issues becomes increasingly critical to delivering a seamless user experience. This blog explores common debugging challenges faced by iOS developers and offers effective tips and strategies for fixing them. 1. Introduction to Debugging Debugging is the process of identifying, isolating, and fixing problems within your code. Whether you’re dealing with crashes, performance issues, or unexpected behavior, effective debugging techniques can save you time and frustration. With the right tools and methodologies, you can streamline the debugging process and enhance your development workflow. 2. Common Debugging Issues 2.1. App Crashes One of the most frustrating issues developers face is app crashes. These can occur for various reasons, including unhandled exceptions, out-of-bounds errors, and memory leaks. Crashes can significantly affect the user experience, making it crucial to identify the root cause quickly. 2.2. UI Layout Problems Incorrect UI layouts are common issues, especially when working with different screen sizes and orientations. Misalignments, overlapping views, and layout constraints not being respected can lead to a subpar user experience. 2.3. Performance Issues Performance problems can arise from inefficient code, excessive memory usage, or improper background task management. Slow app performance can lead to user frustration and ultimately result in app abandonment. 2.4. Networking Errors When integrating APIs or fetching data from the internet, networking errors can occur. These include issues like timeouts, invalid responses, or problems with data parsing. 3. Debugging Tools and Techniques 3.1. Using Xcode’s Debugger Xcode’s built-in debugger is an invaluable tool for diagnosing issues in your app. Here’s how to make the most of it: Breakpoints: Set breakpoints in your code to pause execution at specific lines. This allows you to inspect variables, step through code, and analyze the app’s state at various points. Variable Inspection: While the app is paused, you can inspect the values of variables in the Debug area. This can help identify unexpected values that may lead to issues. Step Over and Step Into: Use the “Step Over” and “Step Into” functions to control execution flow. “Step Into” allows you to dive into a function call to examine its behavior. 3.2. Console Logs Using print statements or logging frameworks like CocoaLumberjack can help track down issues. Console logs provide insights into the app’s execution flow, variable values, and potential error messages. swift Copy code print(“Current user: \(currentUser)”) 3.3. Profiling with Instruments Instruments is a powerful performance analysis tool included with Xcode. It helps identify memory leaks, excessive CPU usage, and other performance-related issues. Allocations Instrument: Use this tool to track memory usage and detect leaks, helping you optimize your app’s memory footprint. Time Profiler: This instrument allows you to analyze CPU usage and pinpoint bottlenecks in your code. 4. Troubleshooting Common Issues 4.1. Handling App Crashes When your app crashes, use the following steps to diagnose the problem: Check Crash Logs: Review the crash logs in Xcode’s Devices and Simulators window or use tools like Crashlytics to gather crash reports from users. Symbolicate Crash Reports: Symbolication translates memory addresses into human-readable function names and line numbers, making it easier to identify the source of the crash. Analyze Error Messages: Pay attention to the error messages in the console. They often provide valuable clues about what went wrong. 4.2. Fixing UI Layout Problems For UI layout issues, consider these debugging techniques: View Hierarchy Debugger: Use Xcode’s View Debugger to visualize the app’s UI hierarchy. It allows you to inspect the properties of views and identify layout issues visually. Debugging Constraints: Check Auto Layout constraints in the Size Inspector. Look for warnings or errors that may indicate conflicting or unsatisfied constraints. 4.3. Resolving Performance Issues To address performance problems, follow these steps: Profile Your App: Use Instruments to profile your app during various tasks to identify performance bottlenecks. Optimize the identified code areas to improve overall performance. Optimize Image Loading: Ensure that you are using appropriately sized images and consider implementing lazy loading for large resources. 4.4. Debugging Networking Issues For networking errors, consider these strategies: Use Postman or cURL: Before testing in your app, use tools like Postman or cURL to test API endpoints. This helps ensure the server is responding correctly. Check Error Handling: Review your error handling code to ensure it correctly logs and processes network errors, allowing for easier troubleshooting. 5. Best Practices for Effective Debugging 5.1. Write Clean and Modular Code Clean and modular code is easier to debug. Break down complex functions into smaller, manageable components, and use clear naming conventions for variables and functions. This approach helps you quickly identify and isolate issues. 5.2. Test Regularly Conduct regular testing throughout the development process. Use unit tests and UI tests to catch issues early. Continuous integration tools can help automate testing and ensure that new code does not introduce regressions. 5.3. Document Your Debugging Process Keep a log of the issues you encounter and the steps you take to resolve them. This documentation can serve as a valuable reference for future debugging sessions and help you identify patterns in recurring problems. 5.4. Seek Help from the Community Don’t hesitate to seek help from the developer community. Platforms like Stack Overflow, Apple Developer Forums, and GitHub can provide insights and solutions from other developers who have faced similar issues. 6. Conclusion Debugging is an integral part of iOS development that can significantly impact the quality of your app. By understanding common issues and employing effective debugging techniques, you can identify and resolve problems efficiently. Utilizing tools like Xcode’s debugger, Instruments, and logging frameworks will enhance your debugging skills and lead to smoother app development. With practice and patience, you’ll become adept at troubleshooting issues, ultimately creating a more reliable and enjoyable experience for your users.

The Benefits of SwiftUI for Modern iOS Development
The Benefits of SwiftUI for Modern iOS Development In recent years, SwiftUI has emerged as a revolutionary framework for building user interfaces across all Apple platforms. Launched by Apple in 2019, SwiftUI simplifies the app development process, allowing developers to create rich, dynamic interfaces with less code than traditional methods. This blog explores the numerous benefits of SwiftUI and why it should be a go-to choice for modern iOS development. 1. Introduction to SwiftUI 1.1. What is SwiftUI? SwiftUI is a declarative framework designed for building user interfaces for iOS, macOS, watchOS, and tvOS. Unlike the traditional UIKit, which uses an imperative approach, SwiftUI allows developers to describe what the user interface should do in response to different states, leading to more readable and maintainable code. 1.2. Declarative Syntax With SwiftUI, developers can write code that expresses the app’s user interface and behavior in a clear and concise way. This declarative syntax simplifies UI creation, enabling developers to focus on what their apps should do rather than how to implement every detail. 2. Key Benefits of SwiftUI 2.1. Reduced Code Complexity One of the most significant advantages of SwiftUI is its ability to reduce code complexity. With its declarative nature, you can create complex UIs with significantly less code compared to UIKit. This reduction in boilerplate code not only accelerates the development process but also makes your codebase easier to read and maintain. swift Copy code import SwiftUI struct ContentView: View { var body: some View { VStack { Text(“Hello, World!”) .font(.largeTitle) .padding() Button(“Tap Me”) { // Action here } } } } 2.2. Live Preview and Hot Reloading SwiftUI offers an exceptional feature called “Live Preview,” which allows developers to see real-time changes in their UI as they code. This capability, combined with hot reloading, enables developers to modify their UI and immediately see the results, streamlining the development process and enhancing productivity. 2.3. Cross-Platform Compatibility SwiftUI is designed to work across all Apple platforms. This means that you can write code once and deploy it on iOS, macOS, watchOS, and tvOS. This cross-platform capability not only saves development time but also provides a consistent user experience across different devices. 2.4. Enhanced Performance SwiftUI leverages the power of Swift, making it optimized for performance. The framework is designed to use system resources efficiently, ensuring smooth animations and transitions. With built-in optimizations, SwiftUI applications are often faster and more responsive compared to those built with UIKit. 2.5. Seamless Integration with Existing UIKit Code For developers transitioning from UIKit to SwiftUI, the framework provides seamless interoperability. You can integrate SwiftUI views into existing UIKit projects and vice versa. This flexibility allows developers to adopt SwiftUI gradually without the need to rewrite their entire application. 2.6. Strong Support for Accessibility SwiftUI includes built-in accessibility features that help developers create apps that are usable for everyone. You can easily add accessibility labels, traits, and hints directly within your SwiftUI code, ensuring that your app is inclusive and compliant with accessibility standards. 3. SwiftUI Components and Features 3.1. Built-in Components SwiftUI comes with a rich set of built-in components, such as buttons, text fields, images, and lists, which can be easily customized and combined to create sophisticated UIs. These components are designed to work seamlessly with the framework’s layout system, making it simple to build complex interfaces. 3.2. State Management SwiftUI introduces a new way to manage state within your application. Using property wrappers like @State, @Binding, and @ObservedObject, developers can easily track changes to data and automatically update the UI when that data changes. This reactive programming model simplifies data management and enhances the responsiveness of your app. swift Copy code struct CounterView: View { @State private var count = 0 var body: some View { VStack { Text(“Count: \(count)”) .font(.largeTitle) Button(“Increment”) { count += 1 } } } } 3.3. Customizability and Modularity SwiftUI allows developers to create reusable components, enhancing code modularity and reducing duplication. You can define custom views and modifiers, making it easy to create consistent designs throughout your application. 4. The Future of SwiftUI 4.1. Continuous Improvements Since its introduction, Apple has consistently improved SwiftUI with each new version of iOS. The framework has gained new features, components, and performance enhancements, making it an increasingly powerful tool for iOS developers. As SwiftUI continues to evolve, it’s expected to become the standard for building user interfaces across all Apple platforms. 4.2. Community Adoption The developer community is rapidly adopting SwiftUI, with many resources, tutorials, and libraries becoming available. This growing ecosystem offers support and tools to help developers get the most out of SwiftUI and stay updated on best practices. 5. Conclusion SwiftUI represents a significant shift in iOS development, offering numerous benefits that streamline the development process and enhance the user experience. Its declarative syntax, cross-platform capabilities, and seamless integration with existing UIKit code make it an attractive choice for both new and experienced developers. As SwiftUI continues to mature, embracing its features will enable developers to create modern, responsive, and user-friendly applications more efficiently than ever. If you’re looking to build innovative iOS apps, SwiftUI is undoubtedly the way to go.

Integrating APIs in Your iOS App: A Complete Guide
Here’s a detailed and SEO-optimized blog titled “Integrating APIs in Your iOS App: A Complete Guide” spanning approximately 1000 words: Integrating APIs in Your iOS App: A Complete Guide Integrating APIs (Application Programming Interfaces) into your iOS app is a crucial step in enhancing its functionality and providing a rich user experience. APIs allow your app to communicate with external services, access data, and utilize features that would be complex or impractical to implement from scratch. This complete guide will walk you through the essential steps for integrating APIs into your iOS app, ensuring a seamless experience for your users. 1. Understanding APIs 1.1. What is an API? An API is a set of rules and protocols that allow different software applications to communicate with each other. In the context of iOS development, APIs enable your app to request and send data to remote servers, access third-party services, and enhance the app’s capabilities. 1.2. Types of APIs REST APIs: These APIs use HTTP requests to access and manipulate data. They are widely used for web services and are based on REST (Representational State Transfer) principles. SOAP APIs: SOAP (Simple Object Access Protocol) APIs use XML for messaging and require a strict protocol for communication. They are less common in mobile development but still used in certain industries. GraphQL APIs: GraphQL allows clients to request only the data they need, providing more flexibility compared to REST. It is increasingly popular for modern web and mobile applications. 2. Choosing the Right API 2.1. Identify Your Needs Before selecting an API, consider the specific features and data your app requires. Common functionalities that APIs can provide include: User authentication Data storage and retrieval Payment processing Geolocation services Social media integration 2.2. Evaluate API Providers When choosing an API, evaluate different providers based on: Documentation: Comprehensive documentation is essential for understanding how to integrate the API effectively. Reliability: Check the API’s uptime and performance metrics to ensure it meets your app’s needs. Pricing: Understand the cost structure, including any usage limits and fees associated with API calls. 3. Setting Up Your iOS Project 3.1. Create a New Xcode Project Start by creating a new Xcode project or opening an existing one where you want to integrate the API. Select the appropriate project template (e.g., Single View App) based on your app’s requirements. 3.2. Add Necessary Frameworks Depending on the API you plan to use, you may need to import additional frameworks into your project. Common frameworks for API integration include: Foundation: Provides essential data types, collections, and operating system services. UIKit: Used for building your app’s user interface. Alamofire: A popular third-party library for networking in Swift. To add Alamofire, you can use CocoaPods or Swift Package Manager (SPM). 4. Making API Requests 4.1. Understanding HTTP Methods APIs typically use different HTTP methods for various actions: GET: Retrieve data from the server. POST: Send data to the server to create a new resource. PUT/PATCH: Update an existing resource. DELETE: Remove a resource from the server. 4.2. Making a GET Request Here’s how to make a simple GET request using Alamofire: swift Copy code import Alamofire func fetchData() { let url = “https://api.example.com/data” AF.request(url).responseJSON { response in switch response.result { case .success(let value): print(“Response JSON: \(value)”) case .failure(let error): print(“Error: \(error.localizedDescription)”) } } } 4.3. Handling Response Data After making a request, you need to handle the response. It’s essential to decode the JSON response into a model that represents the data structure. You can use Swift’s Codable protocol for this. swift Copy code struct DataModel: Codable { let id: Int let name: String } func fetchData() { let url = “https://api.example.com/data” AF.request(url).responseDecodable(of: [DataModel].self) { response in switch response.result { case .success(let dataModels): print(“Data Models: \(dataModels)”) case .failure(let error): print(“Error: \(error.localizedDescription)”) } } } 5. Sending Data to the API 5.1. Making a POST Request To send data to an API, you typically use a POST request. Here’s an example of how to send a JSON payload to create a new resource: swift Copy code func sendData(name: String) { let url = “https://api.example.com/data” let parameters: [String: Any] = [“name”: name] AF.request(url, method: .post, parameters: parameters, encoding: JSONEncoding.default) .responseJSON { response in switch response.result { case .success(let value): print(“Response JSON: \(value)”) case .failure(let error): print(“Error: \(error.localizedDescription)”) } } } 6. Error Handling and Debugging 6.1. Implementing Error Handling Proper error handling is crucial for a good user experience. You can handle errors based on the response status codes and provide meaningful feedback to users. swift Copy code if let httpResponse = response.response { switch httpResponse.statusCode { case 200: print(“Success!”) case 400: print(“Bad Request”) case 401: print(“Unauthorized”) case 404: print(“Not Found”) default: print(“Error: \(httpResponse.statusCode)”) } } 6.2. Debugging Tips Use Debugging Tools: Use Xcode’s debugging tools to inspect network requests and responses. Monitor Network Activity: Use tools like Charles Proxy or Postman to analyze API requests and responses outside your app. 7. Best Practices for API Integration 7.1. Secure Your API Requests When integrating APIs, always prioritize security: Use HTTPS: Ensure all API requests are made over HTTPS to encrypt data in transit. API Keys: Use API keys for authentication, but don’t hard-code them into your app. Instead, consider using environment variables or secure storage. 7.2. Optimize Performance Batch Requests: Minimize the number of API calls by batching requests when possible. Caching: Implement caching strategies to reduce unnecessary network calls and improve app performance. 8. Testing and Validation 8.1. Testing API Integration After integrating the API, thoroughly test the functionality: Unit Tests: Write unit tests for functions that interact with the API to ensure reliability. User Testing: Conduct user testing to validate that the API integration meets user expectations. 8.2. Validate Responses Always validate the data received from the API to prevent crashes or unexpected behavior in your app. Use Swift’s guard statements to handle optional data safely. 9. Conclusion Integrating APIs into your iOS app can significantly enhance its capabilities and user experience. By understanding the fundamentals of API integration, selecting the right APIs, and

The Ultimate Guide to iOS User Interface Design
The Ultimate Guide to iOS User Interface Design Creating an engaging user interface (UI) for iOS applications is essential for providing a seamless user experience and ensuring the success of your app. A well-designed UI not only attracts users but also keeps them engaged and satisfied. In this ultimate guide, we will explore the principles of iOS UI design, best practices, tools, and resources to help you create stunning and user-friendly interfaces for your iOS applications. 1. Understanding iOS Design Principles 1.1. Human Interface Guidelines (HIG) Apple’s Human Interface Guidelines (HIG) are a comprehensive set of principles and recommendations for designing user interfaces for iOS. Understanding and adhering to these guidelines is crucial for creating apps that feel native to iOS users. Key principles include: Clarity: Text, images, and icons should be clear and easily understandable. Deference: The UI should be unobtrusive, allowing the content to shine. Depth: Use visual layers and realistic motion to convey hierarchy and enhance usability. 1.2. Consistency Consistency is vital in UI design. It helps users understand how to navigate your app and what to expect from different interactions. Maintain consistency in: Visual Elements: Use uniform colors, fonts, and icon styles throughout your app. Behavior: Ensure that similar actions produce similar results across different parts of your app. 2. Key UI Components in iOS 2.1. Navigation Effective navigation is essential for helping users find their way through your app. Common navigation patterns in iOS include: Tab Bar: Ideal for apps with multiple top-level views. Tabs should be clearly labeled and provide intuitive icons. Navigation Bar: Use this for hierarchical navigation, where users can drill down into content and easily return to previous screens. Modal Views: For tasks that require user focus, such as entering information or making decisions. 2.2. Buttons and Controls Buttons are crucial interactive elements in your app. Ensure that: Touch Targets: Buttons should be large enough (at least 44×44 points) for easy tapping. Feedback: Provide visual feedback when buttons are tapped, such as color changes or animations. 2.3. Forms and Input Fields When designing forms, consider the following: Field Labels: Use clear and concise labels to indicate what information is required. Keyboard Types: Use appropriate keyboard types for different input fields, such as numeric keyboards for phone numbers. 3. Visual Design Elements 3.1. Color Palette Choosing the right color palette is essential for creating a visually appealing UI. Consider the following tips: Brand Colors: Use your brand’s colors to maintain consistency across your marketing and app. Contrast: Ensure sufficient contrast between text and background colors for readability. Accessibility: Use colors that are accessible to all users, including those with color blindness. 3.2. Typography Typography plays a significant role in your app’s readability and overall aesthetic. Focus on: Font Choices: Use San Francisco, Apple’s system font, for optimal legibility on iOS devices. Hierarchy: Establish a clear hierarchy using different font sizes, weights, and styles for headings, subheadings, and body text. 3.3. Icons and Imagery Icons and imagery enhance the visual appeal of your app and help convey information quickly. Best practices include: Simplicity: Use simple, recognizable icons that communicate their purpose effectively. Quality Images: Use high-resolution images that fit the screen sizes of various iOS devices. 4. Designing for Different iOS Devices 4.1. Adaptive Layouts With a wide range of iOS devices, creating adaptive layouts is crucial for ensuring a consistent experience. Consider the following approaches: Auto Layout: Use Auto Layout in Xcode to create responsive designs that adapt to various screen sizes and orientations. Size Classes: Leverage size classes to create different layouts for compact and regular width/height. 4.2. Dark Mode Support Apple introduced Dark Mode to enhance usability in low-light environments. Ensure your app supports Dark Mode by: Using Semantic Colors: Utilize system-defined colors that automatically adjust to light and dark appearances. Testing: Regularly test your app in both light and dark modes to ensure visual consistency. 5. Interaction Design 5.1. Touch Gestures Incorporating touch gestures can enhance user interactions. Consider: Tap and Hold: Use long-press gestures for additional options or actions. Swipe Gestures: Implement swipe gestures for navigation or dismissing elements. 5.2. Animation and Transitions Animations can provide visual feedback and make your app feel more dynamic. Use animations judiciously to: Guide Users: Use animations to highlight new features or guide users through complex tasks. Enhance Experience: Subtle transitions between screens can create a smoother user experience. 6. Prototyping and Testing 6.1. Prototyping Tools Before finalizing your design, use prototyping tools to create interactive mockups of your app. Popular tools include: Sketch: A vector design tool that is widely used for UI/UX design. Figma: A collaborative design tool that allows multiple users to work on a project simultaneously. 6.2. User Testing Conduct user testing to gather feedback on your app’s usability and design. Key steps include: Creating User Scenarios: Define tasks for users to complete while interacting with your prototype. Analyzing Feedback: Collect feedback and iterate on your design based on user insights. 7. Resources for iOS UI Design 7.1. Design Communities Engage with design communities to gain inspiration, share knowledge, and receive feedback. Some popular platforms include: Dribbble: A community of designers sharing their work and finding inspiration. Behance: Showcase and discover creative work across various disciplines. 7.2. Online Courses and Tutorials Invest in your skills by exploring online courses and tutorials focused on iOS UI design. Platforms like Udemy, Coursera, and LinkedIn Learning offer a wide range of courses to enhance your knowledge. Conclusion Designing a user-friendly and visually appealing iOS app is a crucial aspect of ensuring its success. By understanding the principles of iOS UI design, utilizing key components effectively, and adhering to best practices, you can create a seamless and engaging user experience. Incorporate user feedback, stay updated with design trends, and continuously iterate on your designs to meet the evolving needs of your users. With the right approach, your iOS app can stand out in a competitive market and provide users with an exceptional experience.

10 Common Mistakes to Avoid in iOS App Development
10 Common Mistakes to Avoid in iOS App Development Developing an iOS app is an exciting venture, but it can also be challenging, especially for beginners. While there are numerous resources and tools available, mistakes can still happen, leading to costly delays, poor user experiences, and wasted resources. In this blog, we will discuss ten common mistakes developers make in iOS app development and how to avoid them, ensuring a smoother and more successful development process. 1. Ignoring User Experience (UX) Design 1.1. The Importance of UX One of the most critical aspects of app development is user experience (UX). Poor UX can lead to high uninstall rates and negative reviews, regardless of how functional your app may be. 1.2. How to Avoid This Mistake Conduct User Research: Understand your target audience’s preferences and pain points. Conduct surveys, interviews, and usability tests to gather insights. Design with Users in Mind: Focus on intuitive navigation, clean layouts, and consistent design elements. Use design guidelines provided by Apple, such as the Human Interface Guidelines. 2. Neglecting App Testing 2.1. The Risks of Insufficient Testing Rushing through the testing phase can result in undetected bugs, crashes, and poor performance. This oversight can damage your app’s reputation and lead to negative reviews. 2.2. How to Avoid This Mistake Implement Testing Early: Adopt a test-driven development (TDD) approach. Write tests alongside your code to identify issues early in the development process. Use Automated Testing Tools: Leverage Xcode’s built-in testing features, such as XCTest, to automate unit and UI testing. 3. Overcomplicating Features 3.1. The Problem with Complexity While it’s tempting to include numerous features, overcomplicating your app can lead to confusion and overwhelm users. A cluttered app can detract from its primary purpose. 3.2. How to Avoid This Mistake Prioritize Core Features: Identify the core functionality of your app and focus on delivering it well. Avoid adding unnecessary features that may complicate the user experience. Iterate Gradually: Start with a Minimum Viable Product (MVP) that addresses your users’ primary needs. You can then gather feedback and incrementally add features based on user demand. 4. Failing to Optimize Performance 4.1. The Impact of Poor Performance Slow loading times, unresponsive interfaces, and excessive battery drain can lead to frustrated users who may uninstall your app. Performance optimization is crucial for retaining users. 4.2. How to Avoid This Mistake Profile Your App: Use Xcode’s Instruments tool to profile your app and identify performance bottlenecks. Monitor CPU usage, memory consumption, and network requests. Optimize Resources: Compress images, minimize network calls, and use caching strategies to improve loading times and overall performance. 5. Neglecting App Store Guidelines 5.1. The Risks of Non-compliance Failing to adhere to Apple’s App Store Review Guidelines can result in app rejection, delays in release, and wasted development efforts. 5.2. How to Avoid This Mistake Familiarize Yourself with Guidelines: Review Apple’s guidelines thoroughly before submitting your app. Pay close attention to sections related to user privacy, security, and content. Prepare for Rejections: Be prepared for potential rejections and learn from feedback provided by Apple to improve your app before resubmission. 6. Skipping Documentation 6.1. The Importance of Documentation Neglecting to document your code can lead to confusion, especially when collaborating with other developers or revisiting your project after some time. 6.2. How to Avoid This Mistake Comment Your Code: Write clear and concise comments explaining the purpose of complex code blocks and functions. Maintain Comprehensive Documentation: Create user manuals, API documentation, and setup guides to assist future developers and users. 7. Poor Version Control Practices 7.1. The Consequences of Poor Version Control Without a proper version control system, managing code changes can become chaotic, leading to lost work, merge conflicts, and difficulty tracking changes. 7.2. How to Avoid This Mistake Use Git: Implement a version control system like Git to track changes, collaborate with others, and revert to previous versions if necessary. Follow Branching Strategies: Adopt a consistent branching strategy, such as Git Flow, to manage feature development, bug fixes, and releases. 8. Ignoring Feedback 8.1. The Value of User Feedback User feedback is invaluable for improving your app and addressing pain points. Ignoring feedback can hinder your app’s growth and user satisfaction. 8.2. How to Avoid This Mistake Encourage Reviews: Prompt users to leave feedback and reviews in the App Store. Use in-app prompts to gather insights about their experience. Act on Feedback: Analyze feedback and implement necessary changes or updates to enhance user experience and address concerns. 9. Underestimating Marketing Efforts 9.1. The Impact of Insufficient Marketing Even the best app can fail to gain traction without effective marketing. Underestimating the importance of promotion can lead to low visibility and poor downloads. 9.2. How to Avoid This Mistake Develop a Marketing Plan: Create a comprehensive marketing strategy that includes social media promotion, content marketing, and influencer partnerships. Optimize for ASO: Implement App Store Optimization (ASO) techniques to improve your app’s visibility in the App Store. Use relevant keywords, engaging descriptions, and high-quality visuals. 10. Failing to Plan for Updates 10.1. The Importance of Continuous Improvement The app development process doesn’t end at launch. Failing to plan for regular updates can result in stagnation and missed opportunities for improvement. 10.2. How to Avoid This Mistake Schedule Regular Updates: Plan a schedule for regular updates that include bug fixes, performance improvements, and new features. Stay Informed: Keep up with industry trends, user preferences, and technological advancements to ensure your app remains relevant. Conclusion Avoiding common mistakes in iOS app development is crucial for creating a successful application. By prioritizing user experience, conducting thorough testing, optimizing performance, and following best practices, you can increase your chances of building an app that resonates with users. Remember, app development is an iterative process. Learning from your mistakes and continuously improving your app will lead to better user satisfaction and long-term success in the competitive app landscape. By implementing these strategies, you can navigate the complexities of iOS app development with confidence and achieve your goals.

Exploring Xcode: Your Essential iOS Development Toolkit
Exploring Xcode: Your Essential iOS Development Toolkit When it comes to developing iOS applications, having the right tools is crucial for success. Xcode, Apple’s official integrated development environment (IDE), is the cornerstone of iOS app development. It provides developers with everything they need to design, build, test, and submit applications for the iPhone, iPad, and other Apple devices. In this blog, we will explore the key features of Xcode, its components, and best practices to maximize your development efficiency. 1. Introduction to Xcode 1.1. What is Xcode? Xcode is a powerful IDE designed specifically for macOS, making it the go-to tool for developing software for Apple platforms. It supports various programming languages, including Swift and Objective-C, and integrates a wide range of features to streamline the development process. From writing code to debugging and deploying apps, Xcode provides a comprehensive environment for developers. 1.2. System Requirements To use Xcode, you need a Mac running macOS. It’s important to keep your system updated, as new versions of Xcode often require the latest macOS updates. Check the official Apple website for the specific requirements for the latest Xcode version. 2. Key Features of Xcode 2.1. Code Editor Xcode’s code editor is where the magic begins. It provides syntax highlighting, code completion, and real-time feedback on your code. The editor supports Swift and Objective-C, making it easy to write and manage your codebase. Key features include: Code Snippets: Quickly insert commonly used code snippets. Refactoring Tools: Easily rename variables, extract methods, and perform other refactoring tasks. Version Control Integration: Built-in support for Git allows you to manage your code versions seamlessly. 2.2. Interface Builder Creating an intuitive user interface (UI) is essential for any iOS app, and Xcode’s Interface Builder simplifies this process. It provides a drag-and-drop interface for designing your app’s layout without writing a single line of code. Key functionalities include: Storyboard and XIB Files: Create complex UIs using storyboards or individual XIB files. Auto Layout: Design responsive layouts that adapt to various screen sizes and orientations. Preview Mode: Instantly see how your UI will look on different devices. 2.3. Simulator Xcode includes a built-in iOS Simulator that allows you to test your apps on various virtual devices. This feature is invaluable for: Testing Different Screen Sizes: Check how your app behaves on various iPhone and iPad models. Debugging: Identify issues before deploying your app to real devices. Simulating Conditions: Test your app’s performance in different network conditions, such as slow connections or no connectivity. 2.4. Debugging Tools Debugging is an essential part of the development process, and Xcode provides robust debugging tools to help you identify and fix issues in your code. Key features include: Breakpoints: Set breakpoints to pause your app’s execution and inspect variables and the call stack. View Debugger: Analyze your app’s UI hierarchy and inspect views in real-time. Memory Debugger: Monitor memory usage to identify potential leaks and optimize performance. 3. Building and Running Your App 3.1. Project Management Xcode organizes your code and resources in a project structure, allowing you to manage files efficiently. The project navigator lets you browse through source files, images, and other assets quickly. You can create multiple targets within a single project for different app versions or configurations. 3.2. Running Your App Once you’ve developed your app, running it in the simulator or on a physical device is straightforward. You can choose the target device from a dropdown menu and hit the “Run” button. Xcode compiles your code, installs the app, and launches it on the selected device, enabling real-time testing and debugging. 4. Testing and Continuous Integration 4.1. Unit and UI Testing Xcode supports automated testing through XCTest, allowing you to write unit tests and UI tests to ensure your app functions correctly. Key benefits include: Test Coverage: Measure the effectiveness of your tests and identify untested code paths. Continuous Testing: Run tests automatically during development to catch issues early. 4.2. Continuous Integration with Xcode Server For teams working on larger projects, Xcode Server facilitates continuous integration. It automates the process of building, testing, and distributing your app, ensuring that changes are tested frequently and that the codebase remains stable. 5. App Distribution 5.1. App Store Submission Once your app is ready for launch, Xcode makes it easy to prepare it for submission to the App Store. You can archive your app, validate it, and upload it directly from Xcode. Key considerations include: App Store Connect: Create an account on App Store Connect to manage your app’s metadata, pricing, and distribution. App Review Guidelines: Familiarize yourself with Apple’s guidelines to avoid rejections during the submission process. 5.2. Ad Hoc Distribution Xcode also allows you to distribute your app for testing purposes through Ad Hoc distribution. This method lets you share your app with a limited number of users by registering their devices in your developer account. 6. Best Practices for Using Xcode 6.1. Organize Your Codebase Maintain a clean and organized codebase by grouping related files and assets into folders. Use descriptive naming conventions for files and classes to enhance readability. 6.2. Utilize Documentation Xcode provides built-in documentation for Swift and Objective-C. Take advantage of this resource to improve your understanding of frameworks, libraries, and best practices. 6.3. Regularly Update Xcode Apple frequently releases updates to Xcode, introducing new features and bug fixes. Regularly update your IDE to benefit from the latest improvements and enhancements. 7. Community and Resources 7.1. Developer Forums Engage with the developer community through Apple’s Developer Forums and platforms like Stack Overflow. These communities can be valuable resources for troubleshooting issues and sharing knowledge. 7.2. Online Learning Platforms Consider exploring online courses and tutorials focused on Xcode and iOS development. Platforms like Udemy, Coursera, and Ray Wenderlich offer a wealth of resources to help you enhance your skills. Conclusion Xcode is an essential toolkit for any iOS developer, offering a wide array of features to streamline the app development process. From its powerful code editor and user-friendly Interface Builder to robust debugging tools and

How to Monetize Your iOS App: Strategies That Work
How to Monetize Your iOS App: Strategies That Work With millions of apps available on the Apple App Store, creating a successful iOS app is just the beginning. To ensure sustainability and profitability, app developers must explore effective monetization strategies. Understanding your audience and the right approach to monetization can significantly impact your app’s success. In this blog, we will discuss proven strategies to monetize your iOS app effectively. 1. Understanding Monetization Models Before diving into specific strategies, it’s essential to understand the primary monetization models available for iOS apps. Each model has its advantages and challenges, and the right choice will depend on your app’s nature, target audience, and market trends. 1.1. Free vs. Paid Apps Free Apps: Most apps in the App Store are free to download. This model attracts more users but relies on alternative monetization strategies, such as ads or in-app purchases. Paid Apps: Users pay a one-time fee to download the app. While this model generates immediate revenue, it may limit your app’s reach compared to free alternatives. 1.2. Freemium Model The freemium model offers a basic version of the app for free while charging for premium features, additional content, or advanced functionalities. This model is popular because it allows users to try the app before committing financially. 2. In-App Advertising 2.1. Ad Networks In-app advertising is a common monetization strategy for free apps. Developers can integrate ad networks such as Google AdMob, Facebook Audience Network, or Unity Ads to display ads within the app. There are several ad formats to choose from: Banner Ads: Small ads displayed at the top or bottom of the screen. They are non-intrusive but may generate lower revenue. Interstitial Ads: Full-screen ads that appear at natural transition points in the app. These can be more engaging and yield higher revenues. Rewarded Video Ads: Users watch ads in exchange for in-app rewards or bonuses. This format is popular in gaming apps and encourages user engagement. 2.2. Optimizing Ad Revenue To maximize ad revenue, consider the following strategies: Targeting: Use targeted advertising to show relevant ads based on user behavior and preferences. Frequency Capping: Limit the number of times users see the same ad to prevent ad fatigue and improve user experience. A/B Testing: Experiment with different ad placements and formats to find the most effective combinations. 3. In-App Purchases 3.1. Virtual Goods and Currency In-app purchases allow users to buy virtual goods or currency within the app. This strategy is particularly effective in gaming apps, where users can purchase items, skins, or upgrades. Offering limited-time promotions or exclusive items can increase user engagement and drive sales. 3.2. Subscription Models Subscriptions provide a steady revenue stream by charging users a recurring fee for access to premium features, content, or services. Common subscription types include: Monthly Subscriptions: Users pay a fee every month for ongoing access. Annual Subscriptions: Users commit to a longer period, often at a discounted rate. 3.3. Offering Free Trials Offering a free trial period for subscription-based apps allows users to experience premium features before committing to a purchase. This approach can significantly increase conversion rates and user satisfaction. 4. Sponsorship and Partnerships 4.1. Collaborating with Brands Partnering with brands or companies can provide additional revenue streams. You can incorporate sponsored content, special offers, or exclusive features that promote the brand while benefiting your users. 4.2. Affiliate Marketing If your app provides recommendations or reviews, consider implementing affiliate marketing. By promoting products or services relevant to your users, you can earn a commission on any sales generated through your app. 5. Data Monetization 5.1. Analyzing User Data User data can be valuable for businesses seeking insights into consumer behavior. With user consent, you can analyze and aggregate data to identify trends and preferences. However, it’s crucial to prioritize user privacy and comply with regulations like GDPR and CCPA. 5.2. Selling Market Insights If your app serves a specific niche or industry, you may be able to sell aggregated market insights or reports to relevant businesses. This strategy can generate passive income while providing valuable information to other organizations. 6. Offering Premium Versions 6.1. Upgrade Options If your app offers a freemium model, consider providing a premium version with enhanced features, an ad-free experience, or exclusive content. Users who find value in your app are often willing to pay for additional benefits. 6.2. Tiered Pricing Implement tiered pricing models that allow users to choose from different levels of access or functionality. This approach caters to a wider audience and allows users to select a plan that aligns with their needs and budget. 7. User Engagement and Retention 7.1. Building a Loyal User Base The success of your monetization strategy heavily depends on user engagement and retention. Focus on providing value to your users through regular updates, new features, and personalized experiences. Engaging users through notifications and in-app messaging can also keep them returning to your app. 7.2. Gamification Incorporating gamification elements, such as rewards, achievements, and challenges, can enhance user engagement and motivation. Users are more likely to make in-app purchases or interact with ads when they are actively engaged in the app. 8. Marketing Your App Effectively 8.1. App Store Optimization (ASO) Invest in App Store Optimization (ASO) to improve your app’s visibility in the App Store. Use relevant keywords, engaging descriptions, and high-quality visuals to attract users and encourage downloads. 8.2. Leverage Social Media Promote your app on social media platforms to reach a wider audience. Share engaging content, user testimonials, and updates to keep potential users informed and interested. 8.3. Influencer Marketing Collaborate with influencers in your niche to promote your app. Influencers can provide authentic reviews and endorsements, helping you reach their audience and build credibility. Conclusion Monetizing your iOS app effectively requires a strategic approach that combines various revenue models, user engagement techniques, and effective marketing strategies. By understanding your audience, leveraging in-app advertising, implementing in-app purchases, and exploring partnerships, you can create a sustainable revenue stream for your app. As the mobile app

Building iOS Apps: Best Practices for Success
Building iOS Apps: Best Practices for Success In the competitive world of mobile app development, building a successful iOS app requires more than just coding skills. Developers need to consider user experience, performance, design, and marketing strategies to ensure their app stands out in a crowded marketplace. In this blog, we will explore best practices for building iOS apps that are not only functional but also engaging and user-friendly. 1. Understanding Your Target Audience 1.1. Research and Analysis Before diving into app development, it’s crucial to understand who your target audience is. Conduct thorough market research to identify user demographics, preferences, and pain points. Utilize tools like surveys, focus groups, and analytics to gather insights that will guide your app’s features and design. 1.2. User Personas Create user personas that represent your ideal users. These personas should include details about their age, profession, interests, and app usage habits. Understanding your audience will help you tailor your app’s functionality and user interface (UI) to meet their needs. 2. Designing an Intuitive User Interface 2.1. Focus on User Experience (UX) User experience is paramount in iOS app development. A well-designed app should be intuitive and easy to navigate. Use familiar design patterns and UI components that align with Apple’s Human Interface Guidelines. Consider conducting usability tests to gather feedback on your app’s design before finalizing it. 2.2. Consistency is Key Maintain consistency throughout your app to enhance usability. Ensure that buttons, icons, and navigation elements are uniform across all screens. Consistency helps users understand how to interact with your app and reduces the learning curve. 2.3. Prioritize Accessibility Design your app with accessibility in mind. Incorporate features like VoiceOver support, adjustable text sizes, and high-contrast colors to ensure that users with disabilities can navigate your app effectively. Apple provides extensive resources on accessibility best practices for iOS apps. 3. Choosing the Right Development Tools and Technologies 3.1. Swift and SwiftUI Swift is the preferred programming language for iOS app development due to its modern syntax, safety features, and performance. SwiftUI, Apple’s declarative UI framework, simplifies the process of building user interfaces. Leveraging these technologies can enhance your development speed and code quality. 3.2. Integrated Development Environment (IDE) Use Xcode, Apple’s official IDE, for developing your iOS app. Xcode provides a comprehensive suite of tools for coding, testing, and debugging your app. Familiarize yourself with Xcode’s features, including Interface Builder, version control integration, and performance analysis tools. 4. Implementing Robust Testing Procedures 4.1. Automated Testing Incorporate automated testing into your development process. Tools like XCTest allow you to create unit tests and UI tests to ensure your app functions correctly. Automated tests help identify bugs early in the development cycle, reducing the risk of issues post-launch. 4.2. Beta Testing Conduct beta testing to gather feedback from real users before launching your app. Utilize platforms like TestFlight to distribute your app to beta testers. Collecting user feedback during this phase can help you identify areas for improvement and enhance the overall quality of your app. 5. Optimizing App Performance 5.1. Efficient Memory Management Memory management is critical in iOS app development. Use automatic reference counting (ARC) to manage memory efficiently and avoid memory leaks. Regularly monitor your app’s memory usage and optimize data structures to enhance performance. 5.2. Network Optimization If your app relies on network connectivity, optimize your network requests to minimize latency. Utilize tools like URLSession to manage network calls efficiently. Implement caching strategies to reduce the number of network requests and improve the user experience, especially in areas with limited connectivity. 6. Focusing on Security 6.1. Data Protection Ensure that user data is protected by implementing strong encryption methods. Use Apple’s Keychain Services to securely store sensitive information such as passwords and tokens. Regularly update your app to address any security vulnerabilities and keep user data safe. 6.2. App Store Guidelines Compliance Familiarize yourself with Apple’s App Store Review Guidelines to ensure your app complies with their security and privacy requirements. Non-compliance can lead to app rejection, delaying your launch and affecting your credibility. 7. Effective App Marketing Strategies 7.1. Build a Landing Page Create a dedicated landing page for your app to generate buzz before its launch. Include information about your app’s features, screenshots, and a call to action for users to sign up for updates. An engaging landing page can help you build an email list and create anticipation. 7.2. Leverage Social Media Utilize social media platforms to promote your app and engage with potential users. Share updates, behind-the-scenes content, and user testimonials to create a community around your app. Encourage user-generated content to build trust and authenticity. 7.3. App Store Optimization (ASO) Optimize your app store listing to improve its visibility in search results. Use relevant keywords in your app title and description, and include high-quality screenshots and an engaging app preview video. Positive reviews and ratings also play a crucial role in ASO. 8. Continuous Improvement and Updates 8.1. Monitor User Feedback After your app is launched, actively monitor user feedback and reviews. Pay attention to common issues and feature requests. Regularly update your app to address bugs, improve performance, and introduce new features based on user suggestions. 8.2. Stay Updated with Trends The mobile app development landscape is constantly evolving. Stay informed about the latest trends, technologies, and user preferences. Engage with the developer community through forums, conferences, and online courses to keep your skills and knowledge up to date. Conclusion Building a successful iOS app requires a comprehensive approach that encompasses understanding your audience, designing a user-friendly interface, selecting the right tools, implementing robust testing procedures, optimizing performance, ensuring security, and effectively marketing your app. By following these best practices, developers can create engaging and high-quality iOS applications that stand out in the competitive app marketplace. As the demand for mobile applications continues to grow, investing time and effort into these best practices will not only lead to successful app development but also enhance user satisfaction and retention. Remember, the key to success lies

Swift Programming: The Future of iOS App Development
Swift Programming: The Future of iOS App Development In the rapidly evolving world of mobile app development, Swift has emerged as the leading programming language for iOS. Developed by Apple and released in 2014, Swift has gained significant traction among developers due to its modern syntax, performance capabilities, and powerful features. As we look toward the future of iOS app development, Swift is poised to play a critical role in shaping the industry. In this blog, we will explore why Swift is the language of choice for iOS development, its advantages, key features, and the future trends to watch. 1. The Rise of Swift: A Brief Overview Swift was introduced to address the shortcomings of its predecessor, Objective-C, which had become cumbersome and less accessible for new developers. With its clean and expressive syntax, Swift makes coding more intuitive and allows developers to write safer, more efficient code. The language has seen widespread adoption, with many major apps and frameworks being built using Swift. Key Milestones in Swift’s Development: Swift 1.0: Released in 2014, marking Apple’s commitment to a modern programming language. Swift 2.0: Introduced error handling and improved performance. Swift 3.0: Major syntax changes that further streamlined the language. Swift 5.0: Added ABI stability, making it easier to integrate Swift with existing apps and frameworks. Today, Swift is not only the primary language for iOS development but is also being adopted for macOS, watchOS, and tvOS, creating a cohesive ecosystem for developers. 2. Advantages of Using Swift for iOS Development 2.1. Safety and Performance Swift is designed with safety in mind. Its strong typing system helps prevent common programming errors, such as null pointer exceptions, which can lead to crashes. Features like optionals and type inference reduce the likelihood of runtime errors, resulting in more stable applications. Additionally, Swift is optimized for performance. The language is built on a powerful LLVM compiler, allowing it to execute code quickly and efficiently. This performance advantage is crucial for resource-intensive applications, such as games and multimedia apps. 2.2. Modern Syntax and Readability Swift’s modern syntax makes it easy to read and write, enabling developers to understand and maintain code more efficiently. The language’s use of concise expressions and straightforward syntax allows new developers to ramp up quickly, making Swift an attractive option for teams of all skill levels. 2.3. Interoperability with Objective-C Swift maintains full interoperability with Objective-C, allowing developers to integrate Swift code into existing Objective-C projects seamlessly. This compatibility enables companies to modernize their codebases without needing to rewrite everything from scratch, making the transition to Swift smoother and more manageable. 2.4. Active Community and Ecosystem The Swift community is vibrant and active, providing extensive resources, libraries, and frameworks to assist developers. Apple’s commitment to open-source development has led to the creation of numerous Swift packages and libraries that enhance functionality and reduce development time. Additionally, the Swift community actively participates in forums, conferences, and online platforms, fostering collaboration and knowledge sharing. 3. Key Features of Swift 3.1. Optionals and Type Safety One of Swift’s standout features is its use of optionals, which provide a way to handle the absence of a value safely. By explicitly declaring whether a variable can hold a value or not, developers can avoid runtime crashes and ensure their code is more robust. 3.2. Closures and Functional Programming Swift supports closures, allowing developers to write more expressive and concise code. Closures enable functional programming paradigms, such as passing functions as parameters, which can lead to cleaner and more modular code. 3.3. Protocol-Oriented Programming Swift promotes protocol-oriented programming, allowing developers to define flexible interfaces and structures that can be adopted by various types. This approach encourages code reuse and helps create more modular applications. 3.4. SwiftUI: Declarative Syntax for UI Development SwiftUI, introduced in 2019, revolutionizes the way developers build user interfaces for iOS applications. This declarative framework allows developers to design UI components using Swift code, significantly simplifying the process of creating responsive and dynamic interfaces. SwiftUI’s live preview feature enables real-time visual feedback during development, streamlining the design process and enhancing productivity. 4. Future Trends in Swift and iOS Development 4.1. Continued Evolution of Swift As Apple continues to invest in Swift, developers can expect regular updates that introduce new features, improve performance, and enhance compatibility with the latest iOS versions. The ongoing development of Swift will likely focus on improving safety, performance, and developer experience, making it an even more attractive option for app development. 4.2. Increased Adoption of SwiftUI SwiftUI is set to become the standard for building user interfaces in iOS applications. As more developers adopt SwiftUI, we can expect to see innovative UI designs and improved user experiences. With the introduction of new components and features, SwiftUI will continue to evolve and simplify the UI development process. 4.3. Integration with Machine Learning Apple has been making strides in integrating machine learning into its ecosystem, and Swift is poised to play a significant role in this area. With frameworks like Core ML and Create ML, developers can easily incorporate machine learning capabilities into their iOS applications, enabling more intelligent and responsive user experiences. 4.4. Growing Demand for Cross-Platform Development As the demand for cross-platform applications continues to rise, Swift may evolve to support greater interoperability with other platforms. While Swift is primarily focused on Apple’s ecosystem, developers may find ways to use Swift for cross-platform development, allowing for broader market reach and increased versatility. 5. Getting Started with Swift For developers looking to dive into Swift programming, there are numerous resources available to facilitate the learning process: 5.1. Official Documentation Apple provides comprehensive documentation on Swift and its frameworks, making it easy for developers to understand the language and its capabilities. 5.2. Online Courses and Tutorials There are many online platforms offering courses and tutorials on Swift programming, ranging from beginner to advanced levels. Websites like Udacity, Coursera, and Codecademy provide interactive learning experiences. 5.3. Books and Community Resources Numerous books cover Swift programming, offering in-depth knowledge and practical examples.
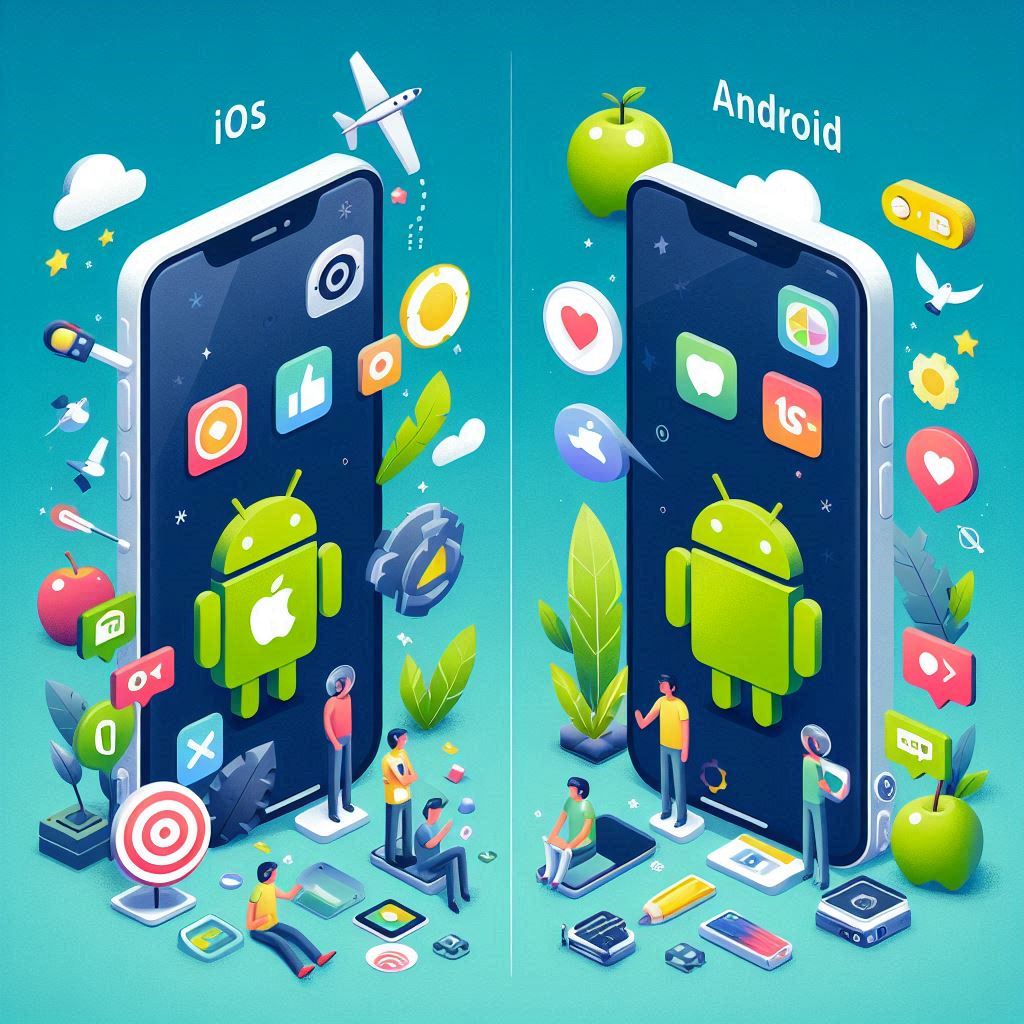
iOS vs. Android: Which Platform Should You Choose?
iOS vs. Android: Which Platform Should You Choose? When it comes to mobile app development, one of the most critical decisions businesses and developers face is choosing between iOS and Android. Both platforms have their unique advantages, user bases, and challenges. Whether you’re building an app to reach a broad audience or one that fits within a specific ecosystem, understanding the key differences between iOS and Android can help guide your decision-making process. In this blog, we will explore the factors to consider when choosing between iOS and Android, including market share, development costs, user demographics, and monetization potential. 1. Market Share and User Base iOS Market Share: iOS, developed by Apple, has a loyal and affluent user base, particularly in regions like North America, Europe, and parts of Asia. While iOS controls a smaller share of the global market compared to Android, Apple users tend to be more engaged and are often willing to spend more on apps and in-app purchases. Global Market Share (2024): iOS accounts for around 28-30% of the global smartphone market. Regions: iOS is most popular in countries like the United States, Canada, the UK, Australia, and Japan. User Engagement: iOS users are generally more engaged, spending more time on apps and more money on in-app purchases and premium content. Android Market Share: Android, developed by Google, dominates the global smartphone market with a much larger market share, especially in emerging markets. Android’s flexibility and wide range of device options make it the top choice for users worldwide. Global Market Share (2024): Android holds approximately 70-72% of the global smartphone market. Regions: Android leads in markets such as India, Southeast Asia, Africa, and Latin America. Device Variety: Android devices are available at a wide range of price points, making them accessible to users from different economic backgrounds. What to Consider: Target Audience: If you’re targeting users in affluent regions or aiming for higher in-app purchases, iOS might be the better choice. For a broader, global reach, Android offers access to a much larger user base. Device Fragmentation: Android’s wide range of devices, screen sizes, and OS versions can create challenges for developers, while iOS offers more consistency across devices. 2. Development Costs and Complexity iOS Development: iOS app development is known for its streamlined process and fewer device compatibility issues. Since Apple controls both the hardware (iPhone, iPad) and the software (iOS), developers can build apps with a relatively consistent experience across all devices. However, iOS development tends to have a higher upfront cost due to the need for macOS-based development tools, a paid developer account, and App Store review processes. Development Language: Swift (modern, fast) or Objective-C (legacy). Development Tools: Xcode, Apple’s integrated development environment (IDE). Device Range: iOS developers typically need to account for fewer device types, as iPhones and iPads have standardized screen sizes and resolutions. Development Cost: iOS development can be more expensive initially, as developers need access to Apple hardware and tools. Android Development: Android development, while offering access to a larger market, can be more complex due to device fragmentation. Developers need to account for various screen sizes, resolutions, and OS versions. Despite this complexity, Android development can be more cost-effective due to a broader range of development tools and a lower barrier to entry. Development Language: Kotlin (modern, recommended by Google) or Java (legacy). Development Tools: Android Studio, Google’s IDE for Android app development. Device Range: Android’s extensive range of devices requires thorough testing to ensure compatibility across multiple models. Development Cost: Android development can be less expensive in terms of hardware and platform costs, but device fragmentation can increase testing and maintenance costs. What to Consider: Time to Market: iOS apps may be quicker to develop due to fewer device compatibility issues, but Android’s larger user base can make the added complexity worth it for some projects. Development Cost: If you’re working with a tight budget, consider Android for its cost-effectiveness, but account for potential extra costs due to testing and device fragmentation. 3. App Store vs. Google Play: Monetization and Distribution iOS App Store: Apple’s App Store is known for its strict review process, which can ensure higher-quality apps but also make it harder for developers to get their app approved. However, once approved, the App Store tends to be more lucrative for developers. Monetization Potential: iOS users tend to spend more on apps, in-app purchases, and subscriptions. This makes iOS an attractive option for developers looking to generate higher revenues. App Review Process: The App Store has a rigorous review process that can delay app launches but ensures that apps meet Apple’s quality standards. App Distribution: Apple’s centralized platform provides higher control over app distribution and visibility. Google Play Store: Google Play offers a more flexible and developer-friendly environment with a faster approval process. However, app monetization on Google Play is generally lower compared to the App Store due to a larger share of free app downloads and lower user spending. Monetization Potential: While Android apps can generate significant revenue, particularly from ads, iOS apps generally earn more per user. App Review Process: Google Play’s review process is quicker and more lenient than Apple’s, allowing developers to launch their apps faster. App Distribution: With Google Play, developers have more freedom in how they distribute their apps, including offering APKs outside the Play Store, making it easier to reach users. What to Consider: Revenue Models: If your app relies heavily on in-app purchases or paid downloads, iOS may offer higher revenue potential. For apps with an ad-based model, Android’s larger user base can provide more ad impressions. App Approval: Consider the strictness of Apple’s app review process versus the speed and flexibility of Google Play when planning your app launch. 4. User Demographics and Behavior iOS User Demographics: Affluent Users: iOS users typically have higher disposable incomes, making them more likely to spend money on apps and in-app purchases. Engaged Audience: iOS users tend to be more engaged with apps, spending more time and money